> ## Documentation Index
> Fetch the complete documentation index at: https://docs.platform.aiplanet.com/llms.txt
> Use this file to discover all available pages before exploring further.
# Quickstart
> Build, test, and deploy your first AI workflow in a few minutes.
This guide walks you through creating a simple AI workflow end to end: a workflow that takes a question as input, sends it to an agent, and returns an answer.
## Before you start
You need an account on the platform. If you don't have one yet, see [Creating your account](/organization-settings/account-settings). You'll also want at least one model configured — see [Models](/agents-models-tools/models).
## 1. Create a workflow
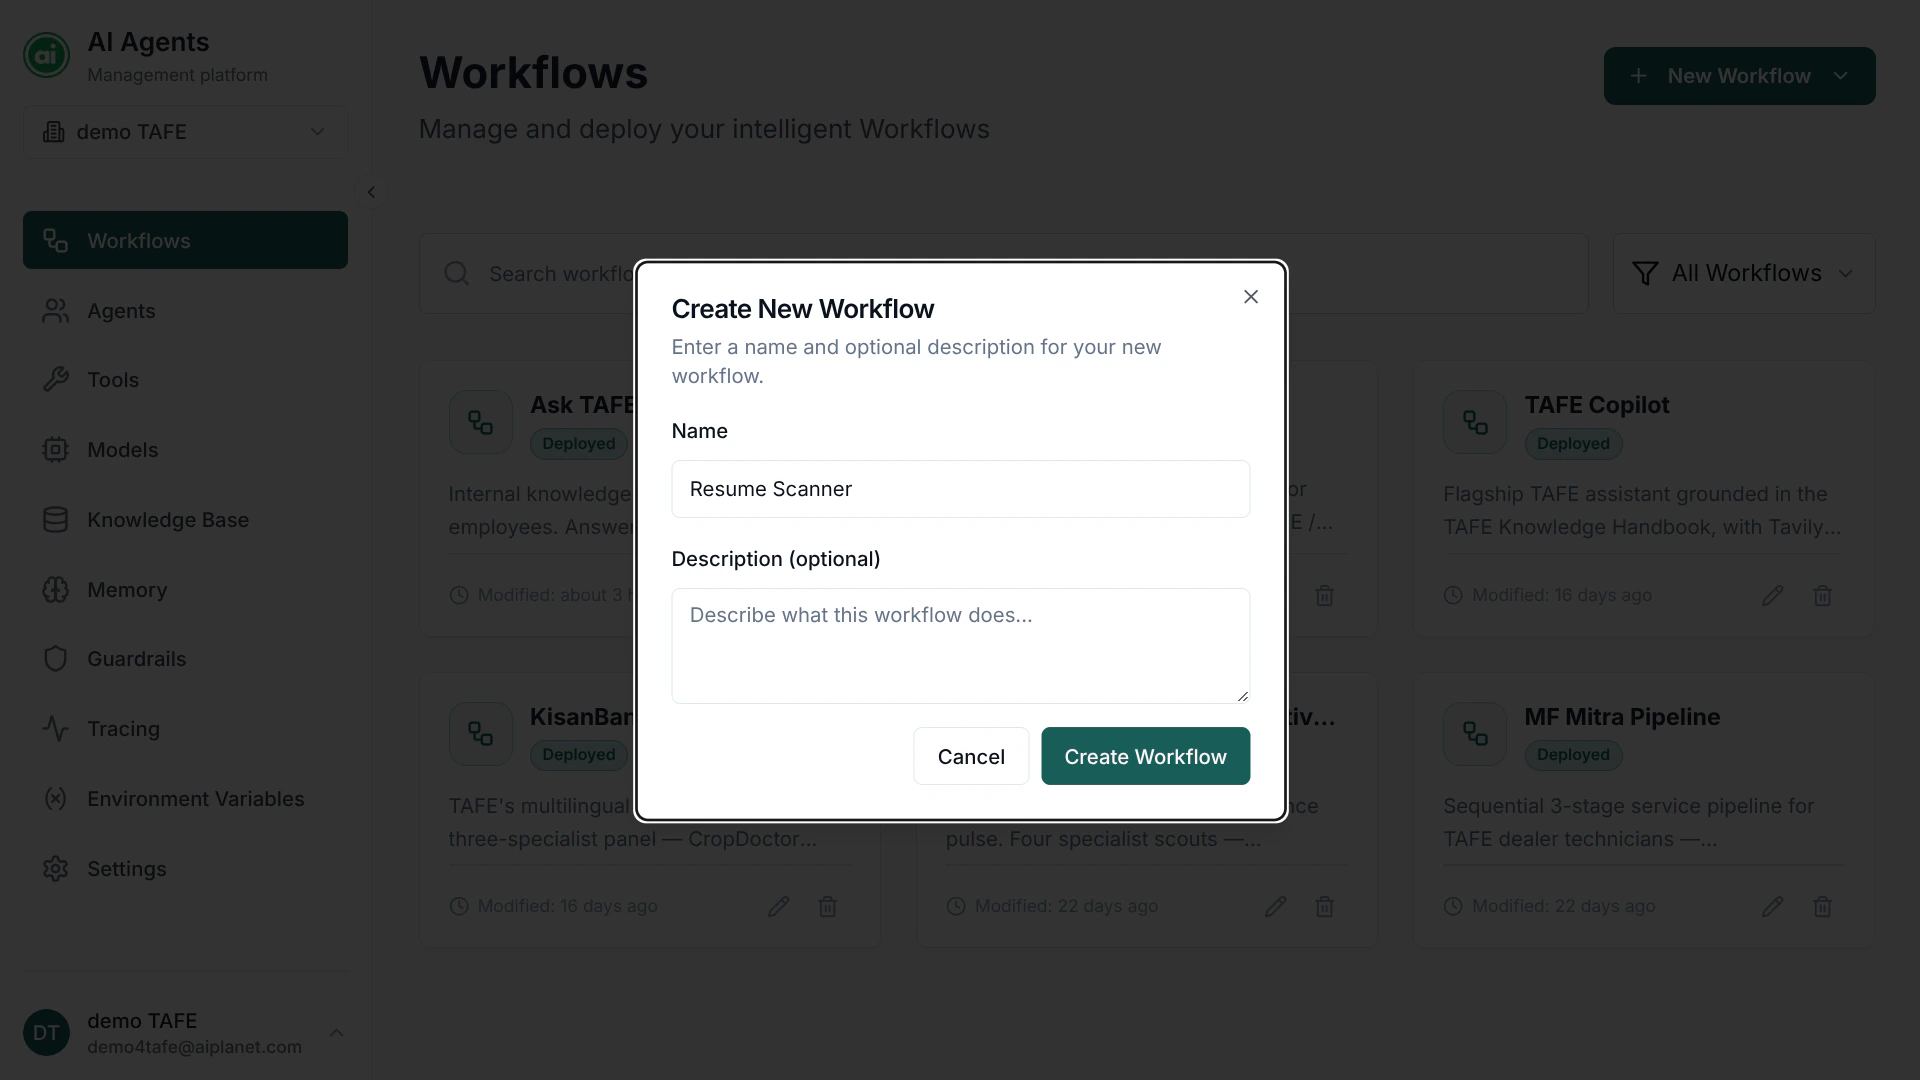
From the dashboard, click **Create New Workflow**. Give it a name like `My First Workflow` and an optional description, then click **Create Workflow**.
You'll land on a blank canvas — this is the workflow builder.
 ## 2. Add an Input node
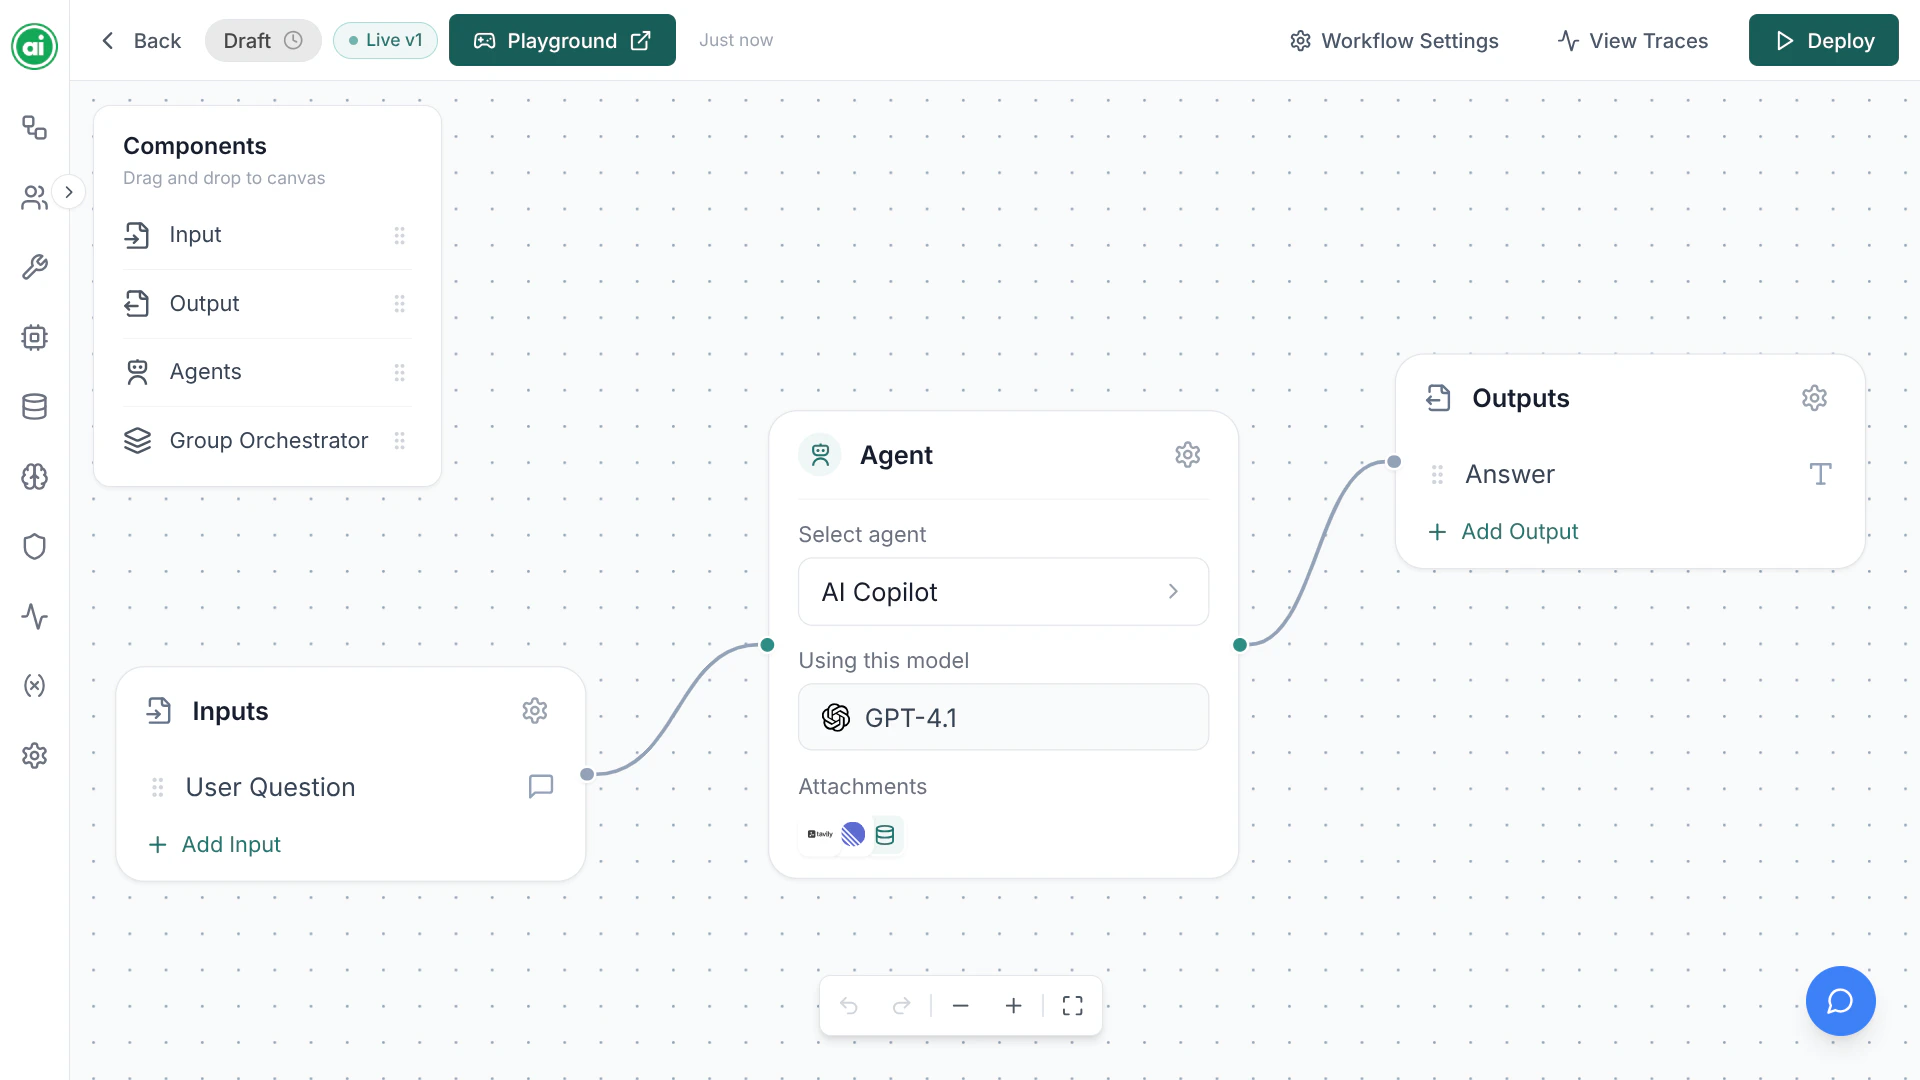
From the component panel on the left, drag an **Input** node onto the canvas. The Input node defines what information your workflow needs to run.
Select the node and add an input parameter — for example, a text parameter named `question`.
## 3. Add an Agent node
Drag an **Agent** node onto the canvas. Select it — the panel shows the agent configurations available to your organization. Click **New Agent** to create one, then:
Give it a clear name, such as `Answer Agent`.
Choose a model from the **Model** dropdown.
In the instructions field, tell the agent what to do — for example:
`You are a helpful assistant. Answer the user's question clearly and concisely.`
Save the agent, and it's selected for the node.
## 4. Add an Output node
Drag an **Output** node onto the canvas. This is what the workflow returns when it finishes.
## 5. Connect the nodes
Connect the nodes to define the flow of information:
```
Input → Agent → Output
```
Drag from the handle on the edge of one node to the handle on the next. See [Connecting nodes](/building-workflows/connecting-nodes) for details.
## 2. Add an Input node
From the component panel on the left, drag an **Input** node onto the canvas. The Input node defines what information your workflow needs to run.
Select the node and add an input parameter — for example, a text parameter named `question`.
## 3. Add an Agent node
Drag an **Agent** node onto the canvas. Select it — the panel shows the agent configurations available to your organization. Click **New Agent** to create one, then:
Give it a clear name, such as `Answer Agent`.
Choose a model from the **Model** dropdown.
In the instructions field, tell the agent what to do — for example:
`You are a helpful assistant. Answer the user's question clearly and concisely.`
Save the agent, and it's selected for the node.
## 4. Add an Output node
Drag an **Output** node onto the canvas. This is what the workflow returns when it finishes.
## 5. Connect the nodes
Connect the nodes to define the flow of information:
```
Input → Agent → Output
```
Drag from the handle on the edge of one node to the handle on the next. See [Connecting nodes](/building-workflows/connecting-nodes) for details.
 ## 6. Deploy it
Save your workflow, then click **Deploy** in the builder header. You'll be asked for an application name. Deploying publishes a versioned snapshot of your workflow — and it's required before you can test or run it.
## 7. Test it in the Playground
Open the **Playground**. It runs your workflow's active deployment. Enter a question, run it, and you'll see the agent's response stream back in real time.
The Playground is the fastest way to iterate. Adjust your agent's configuration, deploy again, run again, and compare.
## Next steps
Go deeper on the canvas and every node type.
Set up your agent's instructions, model, tools, and knowledge.
## 6. Deploy it
Save your workflow, then click **Deploy** in the builder header. You'll be asked for an application name. Deploying publishes a versioned snapshot of your workflow — and it's required before you can test or run it.
## 7. Test it in the Playground
Open the **Playground**. It runs your workflow's active deployment. Enter a question, run it, and you'll see the agent's response stream back in real time.
The Playground is the fastest way to iterate. Adjust your agent's configuration, deploy again, run again, and compare.
## Next steps
Go deeper on the canvas and every node type.
Set up your agent's instructions, model, tools, and knowledge.